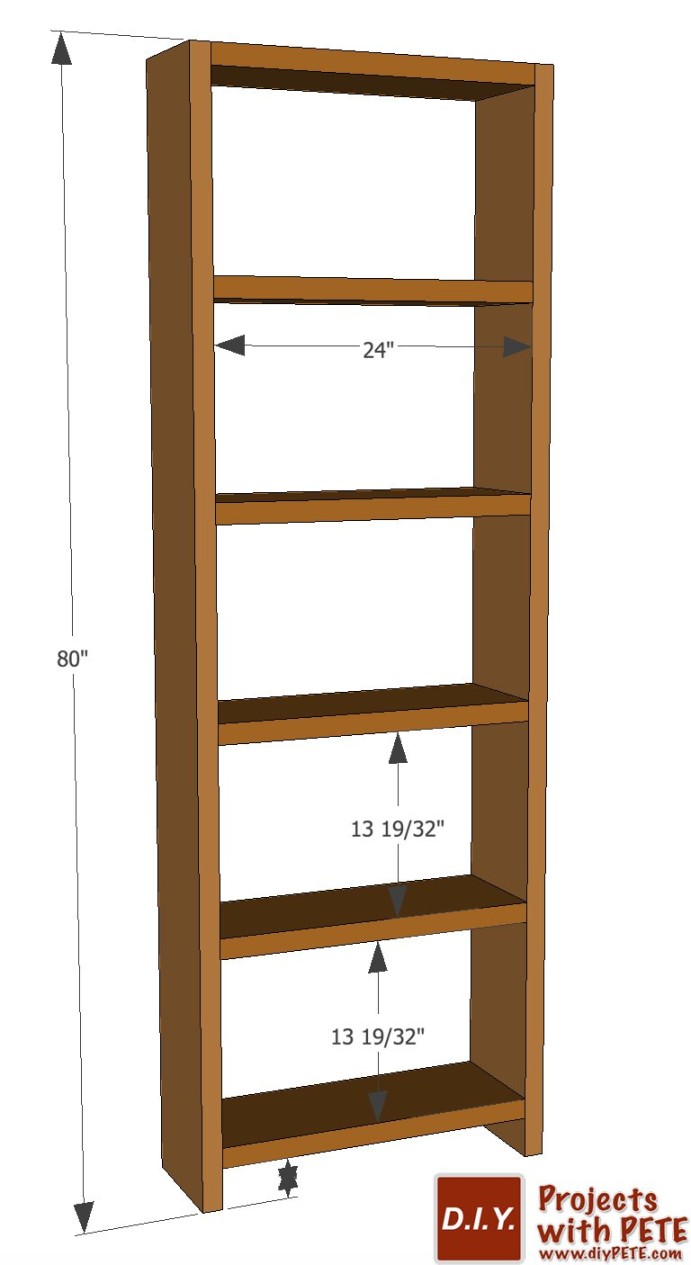
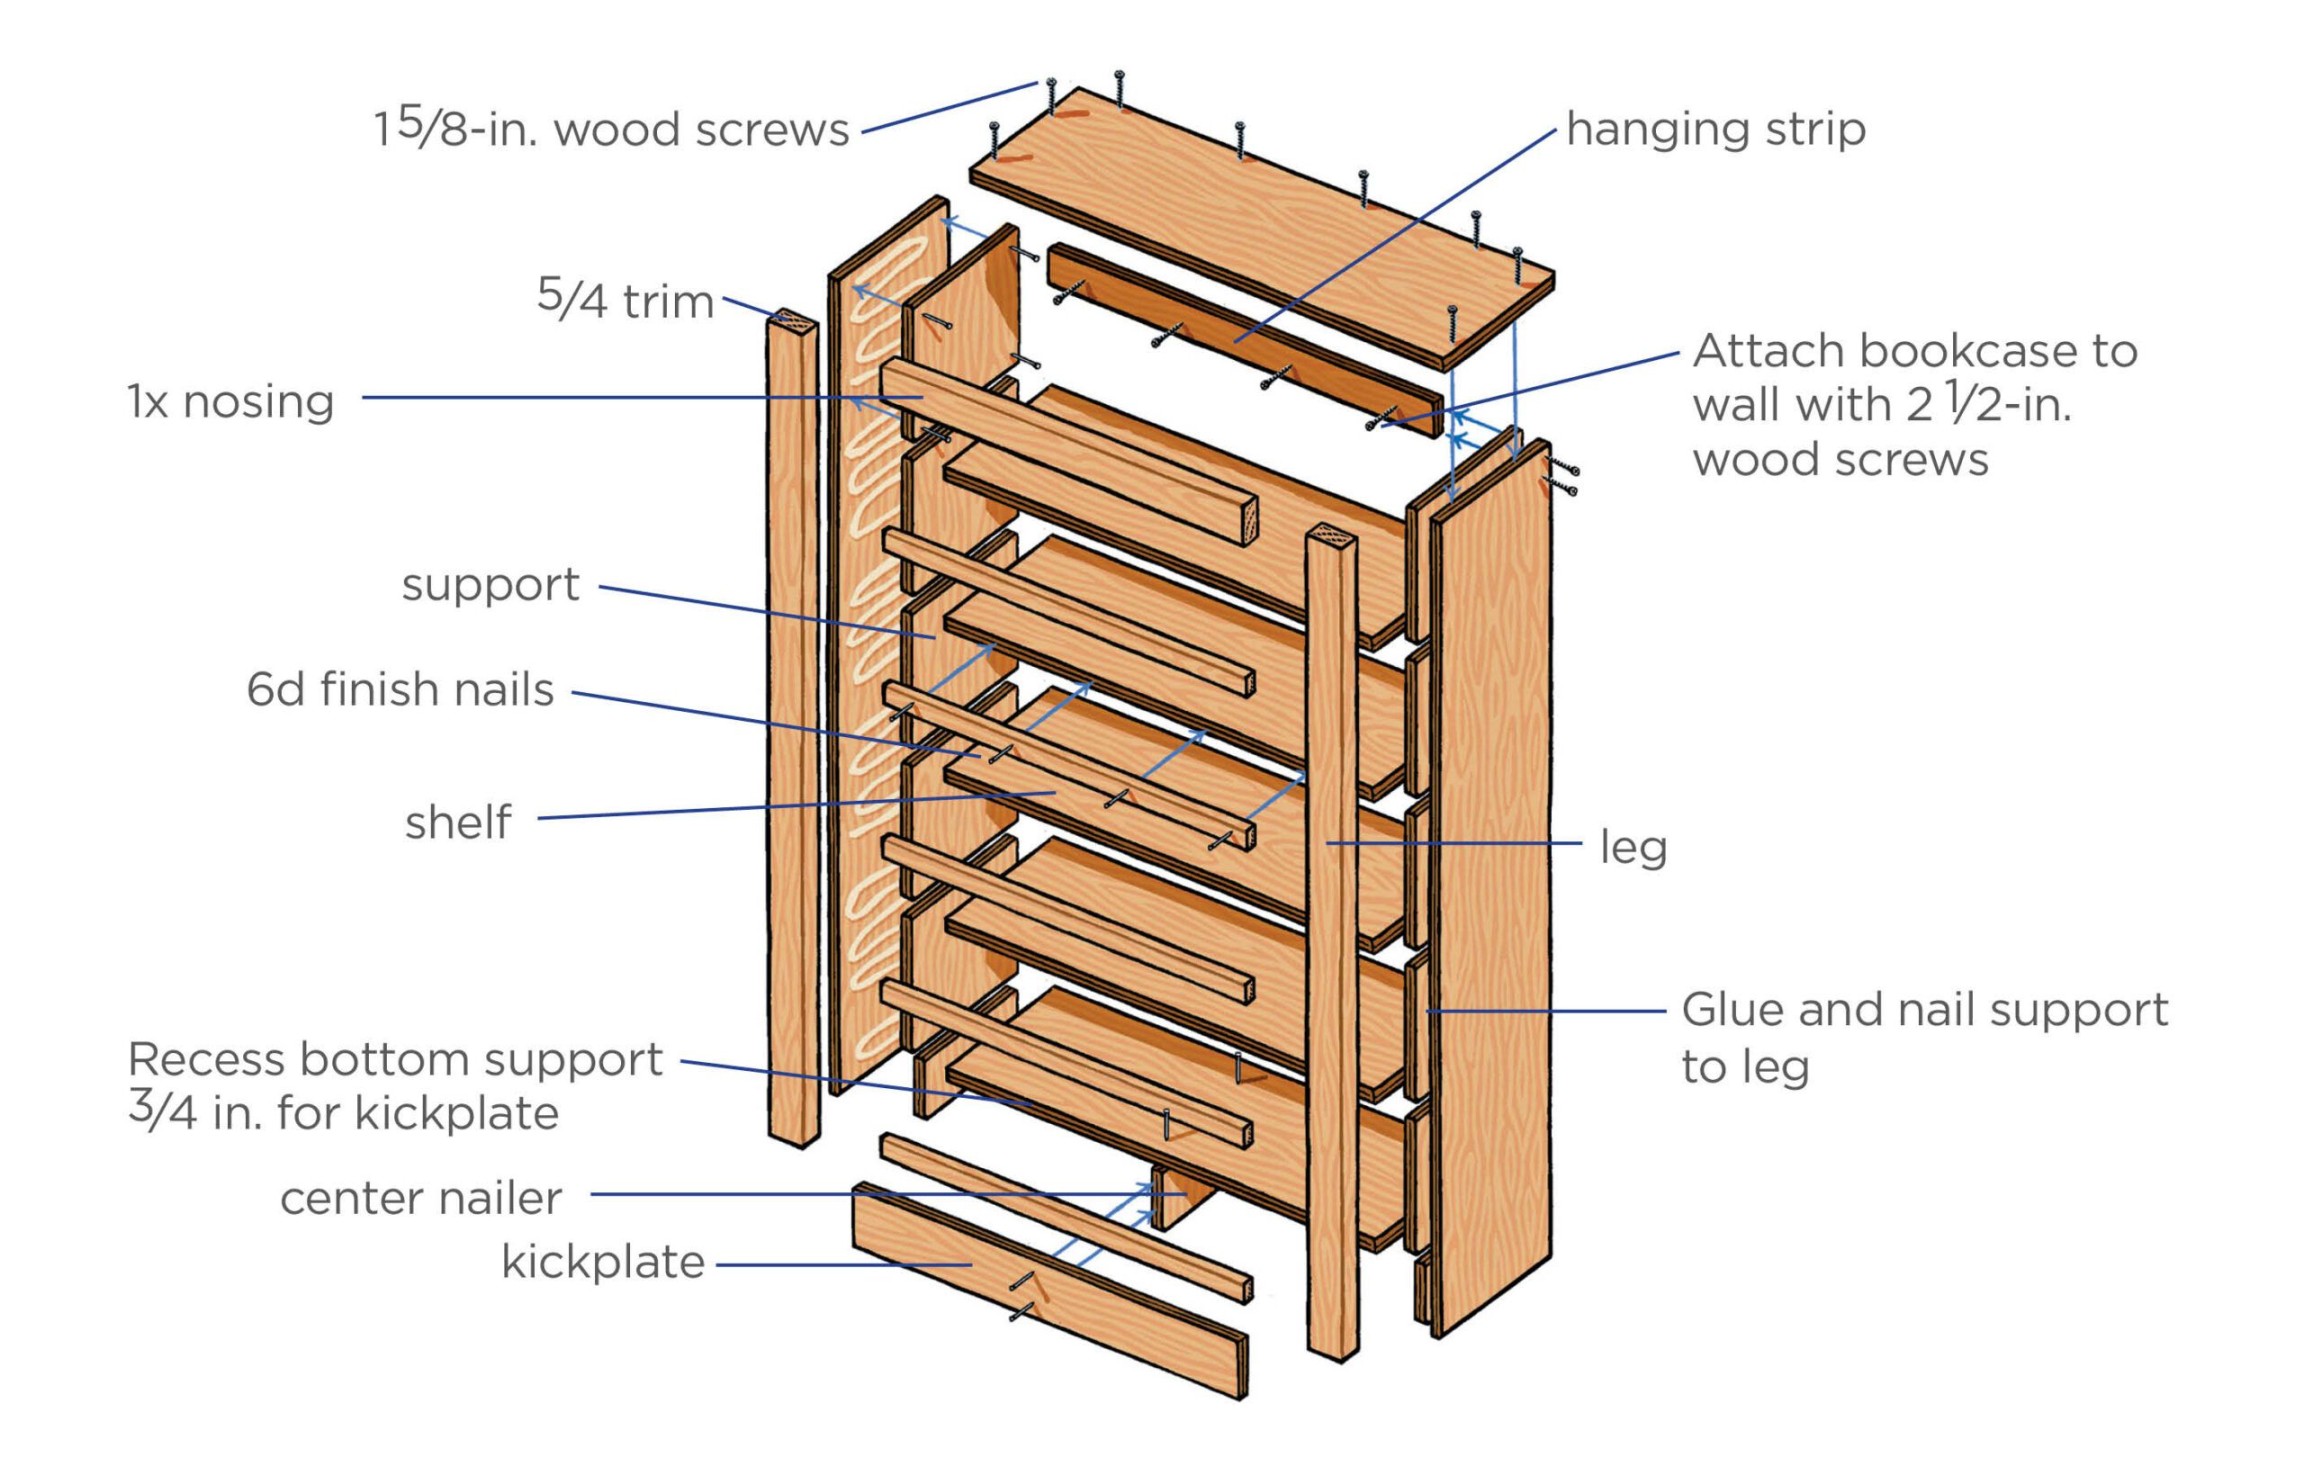
Books, those cherished companions of knowledge and imagination, often find themselves scattered across tables, nightstands, and even the floor. While the sight of bookshelves overflowing with literary treasures is heartwarming, the disarray can be a source of frustration. The solution lies in crafting your own stylish and functional bookcases, empowering you to organize your beloved collection and adorn your home with a touch of personal creativity.

- Embrace the DIY Spirit
Building a bookcase is not an intimidating task, even for those with limited woodworking experience. With readily available materials and simple techniques, you can transform raw lumber into a bookshelf that complements your décor and meets your storage needs. The process is not only rewarding but also allows you to customize the design to suit your personal style, from sleek and contemporary to rustic and charming.

- Planning and Preparation: Laying the Foundation
Before embarking on your DIY journey, gather essential tools like a saw, drill, screwdriver, and measuring tape. Ensure you have adequate workspace and safety equipment, such as gloves and safety glasses. Choose the wood species that aligns with your desired aesthetic and budget. Popular options include pine, oak, and maple, all offering distinct grain patterns and strengths.
- Basic Bookcase Anatomy: Understanding the Structure
A basic bookshelf typically consists of three main components: sides, shelves, and backboards. The sides provide the structural integrity, while the shelves accommodate your books and other items. The backboards add stability and prevent the shelves from sagging. By understanding these fundamental elements, you can create a bookshelf that suits your space and preferences.
- Step-by-Step Guide: Transforming Lumber into a Bookshelf
1. Measure and Cut: Carefully measure the space where the bookshelf will reside. Mark the dimensions on the lumber and use the saw to cut the sides, shelves, and backboards to the appropriate lengths.
2. Joinery Techniques: There are various ways to join the bookshelf components, each offering a distinct look and strength. Simple options include butt joints, rabbet joints, and dados. For a more secure and decorative connection, consider using biscuits or dowels.
3. Assembly: Apply wood glue to the joining surfaces and carefully align the components. Use clamps to hold the joints in place while the glue dries. For extra stability, reinforce the corners with screws or bolts.
4. Shelving Placement: Determine the desired spacing between shelves and mark the positions on the sides. Drill pilot holes to prevent the wood from splitting and secure the shelves with screws or bolts.
5. Finishing Touches: Sand the entire bookshelf to smooth out any rough edges and imperfections. Apply a wood stain or varnish to enhance the appearance and protect the surface.
6. Decoration and Personalization: Add finishing touches to make your bookshelf unique. Consider painting the sides a bold color or incorporating decorative moldings. Customize the shelves with decorative accents or quirky bookends.
- Embrace the Joy of DIY: A Rewarding Experience
Building your own bookcase is a fulfilling experience that allows you to express your creativity, enhance your home décor, and gain valuable DIY skills. With careful planning, execution, and a touch of personalization, you can transform raw lumber into a bookshelf that not only stores your precious books but also stands as a testament to your craftsmanship and passion for DIY projects.

